Friday, October 24, 2014

Over the garden gate (with some effort after this recipe)

Continuing on with our Southern shelf - this next recipe is taken from a book given to me by my mother. Over the Garden Gate is a compilation of recipes from members of the Havana Garden Club. This was a little tricky to be honest. Looking through we were struggling to come up with something that we hadn't really done before so I had the idea of doing a sweet/dessert. Ben doesn't really like too many desserts but he does like pound cake so I found this recipe which sounded good.


The other slight problem though... Um - it's not by my Mama (who obviously contributed many wonderfully sounding recipes to this book!)!! But this recipe is from her good friend Earlene and you can't get more Southern sounding than doing a cake from a nice lady called Earlene. So we opted for the pound cake recipe.

Now one reason you won't see many cakes on this blog (or indeed any type of dessert) is that I went through a phase right after Evelyn was born of trying my hand at baking. I'd say the results were pretty iffy (and that's probably being kind to myself). It's like anything really - the more you do the better you get, I'm sure. But I had one too many failures. Oh! And not to mention that we really don't eat many desserts so even if I made something that was spectacularly delicious it would often get tossed into the bin after being left in the fridge for too long. But it's been a while so I thought I would try again. Why not.

The first step says to mix the flour and cocoa together, then set aside. Great. No problem. I can do that.

Mixing dry ingredients = the easy bit.

Next is separating 6 egg whites. That is a little more tricky, but I am feeling confident....


Only one egg yolk broke!

Wait! Time out! Time to deal with a grabby toddler.

"Mine-oh camera."


Next up is to mix the butter and sugars well, then add the egg yolks one at a time.


But wait a minute. Looking ahead, the recipe then says to add the baking soda and vanilla then fold in the beaten egg whites then bake. Um - what happened to that cocoa and flour mixture done at the start? No offense to Earlene but this recipe seems to be missing some crucial info. That's ok. That is what the internet is for. And the interwebs say for best results to add the the flour alternately with milk (here Earlene uses sour cream) so that's what I did.


 I was careful not to over mix and here's what the batter is looking like...


Next up is to beat all those egg whites until peaked. I had to look again on the interwebs to see what that really meant. The most helpful info I got was that the end result should mean that when you pick the bowl up and move side to side that the egg whites shouldn't move.

This seemed to take forever (took about 10 or 15 mins).

This next bit also seemed scary. Fold in. Now what does that really mean? So we looked that up too and I was feeling pretty confident that I hadn't over mixed it.


Next is to poor mixture into a tube pan. Earlene hadn't mentioned whether or not the tube pan should be greased. Looked that up too, and it seemed the general consensus was that yes, the tube pan should be greased (with Crisco!!) ....AND floured. We didn't have Crisco so used butter. 

Into the tube pan!


THE FINISHED PRODUCT....


I think Earlene had mistakenly left out the bit about adding the flour mixture, but the truth is I have found MOST baking recipes to be missing detail. Detail for a beginner baker. I think many baking recipes assumes the baker to have some basic skill and therefore leaves out detail (which I would find helpful). So if you are a beginner and don't look it up on the internet then you may be making fatal mistakes. This cake turned out ok. Just ok. Earlene said to cook it for 1 1/2 hour or until done (!). I checked after 45 mins and let cook another 15. It was definitely done after that one hour. I am glad I checked before hand. Ben thinks this was also 'Ok' but he really wasn't keen on the chocolate element. 

I am sure that Earlene has probably done this recipe many times and knows it by heart and it turns out perfectly each time. Those are the difficult recipes to replicate on paper probably. 

Sunday, September 7, 2014

It's about time

This next recipe comes from a cookbook that my grandmother gave me many years ago: A Taste of Georgia. It's actually a very popular cookbook in (wait for this shocker....)... Georgia! It's been published for many years and gets updated every year. Given that we've made so many southern dishes over the years I thought it would be good to finally do a dish that I've wanted to try for many years now. Brunswick Stew. I always thought it was very complicated. The only thing I knew about it was that there was no ONE recipe and that it seems to vary from one southern city to another, oh and that there was lots of competition amongst southern states as to who had the ver best. In A Taste of Georgia there were three Brunswick Stew recipes. They all called for copious amounts of meats. Also each recipe said I needed to cook (boil) the meats and then grind them. Well I didn't have a grinder so figured chopping the cooked meats up would be ok. Right, I am jumping ahead of myself a little bit. So each Brunswick recipe in this book was a bit annoying because they were all a bit vague (grrr... hate that). But the recipe I chose seemed the easiest. Here it is:

Too many vague instructions!

I knew from the start I would be having to change the recipe. For one we didn't need to feed an army of people. The next is that I didn't have a grinder. So here is the meat we bought instead of what they suggested...


First annoying vague instruction: boil meat until tender. Hmmm. Well all the various meats cook at different times to achieve "tender" right? I think we based it all around the chicken being cooked (about an hour if I recall). Here is a lovely picture of all the meat after boiling...


As I said, I didn't have a grinder so I removed all the meat (ahem, actually Ben removed the chicken meat from the bones. He is very good at this!) and chopped it up as fine as I could.


(I must admit to feeling pretty worried at this stage. The chicken tasted overcooked and the pork and beef were definitely tough!)

Chopped!

Next annoying vague instruction: put beef and pork back in broth. Oh.... well how much broth should that be really? I had to go online and look at other Brunswick Stew recipes to gage how much broth we should use. I think it was 2 quarts in the end (can't remember). And then we saved the rest to use as a stock for risotto. 

Next was to add the tomatoes and raw (yes raw) onion (it was weird to add raw onion instead of sautéing them at the start). Oh and a whole stick of butter (only 1 since we were cutting the recipe in half!!)

Another low fat southern recipe.

Next comes the ketchup. Again - since we were halving the recipe only 1 cup. 

This and the worcestershire are the "secret" ingredients of the stew.

Next annoying vague instruction was the
What a shocker. It actually turned out to be pretty good!
amount of ketchup and worcestershire to use. Probably once you make this many times you get a feel for how much. I feel that 1 cup of ketchup was too much. Anyway - then you add the corn and chicken and let that heat through and Wha-LA! It actually really looked like Brunswick Stew and even more unbelievably it actually tasted like Brunswick stew. I was actually impressed. My concern about the tough pork and beef was ok in the end because 1) it cooked a lot longer with the tomatoes, onion and other ingredients and 2) because it was chopped up finely so perhaps the toughness isn't such an issue. Perhaps that is why all the meat is supposed to be ground up in the first place.

I realize that this dish is mostly served as a side to BBQ instead of a dish on its own, but too bad. We had it as a main dish with (store bought!) corn bread (that tasted like cake it had so much sugar in it). The stew was pretty cutting (with all that ketchup and worcestershire) so one plate full was plenty for me. We froze the rest, so Mama if you are reading this - get ready to have some when you come to visit in a few weeks and you can be the final judge! :-)

The final product!


Saturday, August 16, 2014

Guten Tag! We're baaaAAAaack. Next stop: Georgia Farms!

Katherine here. It's been a while. Ok - much longer than a "while". We have a very good excuse though. We just returned from living in Berlin for 6 months.
One of my favourite places in Berlin: Gendarmenmarkt
An experience that is hard to put into just a few short sentences here in a cooking blog. But we couldn't keep up with the blog because the blog is dependent on one key attribute: trying out new recipes from our large collection of cookbooks. We weren't about to take our cookbooks with us to Germany. So we left them here for our tenants to use (although I don't think they even used the toilet paper we had left for them so I doubt they even touched the cookbooks).

We did loads of cooking in Germany though. The Germans love their pork and potatoes. Oh that's good.... we love these things too (they also love their salami, cheese and beer. Oh what a coincidence. We love those things too. So it all worked our really well on the food front). One thing that was a bit more difficult to get was good (and large) shrimp. Which is why I chose this next recipe to start our come-back tour. As Ben mentioned in our last blog entry (oh-so long ago), we are now on the last row of the our book shelves and those are all our Southern cookbooks. The next book up is called Best of Georgia Farms and was given to me by my mother as a Christmas present way back in 1998. 

The book takes a tour of different counties and cities around Georgia with recipes to match.

The recipe is called 'Savannah Gumbo' and it won first place 'Main Dish' in the 1994 Great Taste of Georgia Recipe Contest - so what could possibly go wrong. Right?


As per usual, it's important to have a few essentials on hand before getting started. Get your music list sorted....


Next up, one LO (Little Monster)....

"Come mummy... come..."
The recipe calls for peanut oil and also banana peppers.Well, I forgot to get peanut oil and good-ole McCaffrey's didn't have banana peppers.
Poblano peppers. Yes - they DO have heat.
I was convinced that poblano peppers would be just as fine. In fact I thought they had just as much heat as banana peppers (next to nothing). Ben tried to explain to me that this wasn't the case and even showed me the handy heat index printed at McCaffrey's pepper section, but no... I put in the poblano peppers seeds and all. Just two - along with a red bell pepper. Those get sliced along with a large Vidalia onion (amazingly McCaffrey's DOES have Vidalia onions... this was also a motivator for me choosing this recipe). Now this is me just doing the prep. To be honest - the hardest thing about this recipe is making the roux. 1/2 cup of oil along with half cup flour. That needs to be slowly heated for up to 45 minutes to make a gloopy (gravy-like) caramel looking liquid. No worries.

Sprinkling the flour in the oil to make the roux.

It seems to be going well. By this time Ben is home and can look after the LO while I carefully stir and watch the roux to make sure it doesn't burn. It seems to be turning a nice color and consistency. 


But with 5 minutes left (of the suggested 45 minutes simmering) I am becoming concerned. It hasn't really darkened much (from the above picture) and it certainly hasn't become any thicker (not like gravy, that's for sure!) These are the things that really stress me out about cooking. I get all excited about doing a new recipe and then think "why the hell isn't it doing like the recipe says?! I am following it exactly!!" Grrrr. So Ben takes over before I get too wound up about it. But things aren't
improving much for him so we decide to proceed with the rest of the recipe. Now it's time to add onion, pepper and garlic, and let cook for 15 minutes.

Stir, stir, stir and don't let that garlic burn!

But after about 10 minutes it doesn't really feel like anything is sautéing properly. You can see below that the flour/oil mixture has coated the veggies and it's more like a batter now. Maybe this is exactly what is suppose to happen? We have no idea (and so are feeling frustrated).

Onion, peppers and garlic "sauteing" in the roux.

Because the onions aren't near to being transparent, we crank the heat up and add more time. That seems to help and so we move on to the next stage of adding the tomato based sauces and the chopped okra.


Rotel, tomato sauce and chopped okra go in.

This is supposed to cook for another 15 minutes before the shrimp go in. But it quickly turns into a seriously thick paste. I mean like you can't even get your spoon through this mixture. Pictures don't do justice to explain how thick it was. But here goes...


So by now I am on the internet looking up other recipes for gumbo (murmuring obscenities under my breath) and many other recipes seem to all call for water damnit. So we add some water damnit. 

Next add water (wait... that wasn't in the recipe....!)
We are feeling better about the recipe now with the water and also after adding the seasoning (salt, pepper and cajun seasoning - although we hold back on the cayenne and red pepper flakes given that the poblano is giving off plenty of heat... whoa!). So now we add the shrimp. We tend to buy the frozen stuff that is in the freezer right next to the seafood section because once the seafood guy told me that that is all they ever do - just defrost the frozen stuff. 

In go the shrimp. 

Actually it turned out much better than we thought it would.
That then cooks for 10 minutes and goes over cooked rice. The final dish actually looks pretty good and tastes pretty good too. However this took a LONG time to make and was stressful throughout with things not working out. Ok - if we were to do the dish again we'd know certain things so it might not be as stressful but I don't feel motivated at this stage to try this one again. I give it 4 out of 10. Also (and this is completely my fault so can't blame the author of the recipe) it was too hot since I added the poblano peppers AND their seeds.

Friday, November 29, 2013

Shrimp 'n' grits, makeover edition

So, the moment has come. We have hit the Southern Cooking shelf. Recall the premiss of this blog: we are working our way through all the cookbooks we have, which are shelved on a baker's rack Katherine bought 18 months ago.
The book collection has expanded since then, principally on that second row of the rack:
The lower rows have been 'Evelyned'
But the basic idea remains: first, the general recipe/cooking books, then the books written by specific chefs, then cookbooks by region, culminating in the bottom row of Southern Cookbooks and all the wonderful issues of Cooks Illustrated that Judy gave me. Our last recipe was from Alton Brown's cookbook, which had been classed as being Southern because he is from the South. But really, today's book is the first of the strictly Southern ones. And what a success it was! Read on...

It's the Lee Brothers Southern Cookbook. Katherine had bought it for Judy, but then liked it so much she bought it for herself. A good example of the principle: always buy presents for someone that you yourself want! We had done a few recipes from the book before: their meatloaf (delicious with chopped pickle), and famous chicken bog. Our chicken bog was good, but not as good as Judy's: that was the first meal I ever had at Beaver Creek Drive, and it was very memorable. I had three helpings, prompting murmurings of 'Hey, Mikey!'.

Anyway, back to the book. Here it is:
The recipe itself spans three pages. Uh oh!

No wait, FOUR pages!
First, shell the shrimp. Boring!


Make some shrimp boil:
Add to shells to make the stock:


Meanwhile, assemble the grits:
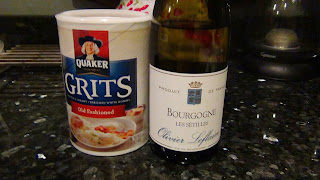
Yes, there is something else in this picture other than the grits.
'Stir grits into a bowl of cold water and allow to settle':
'Corn hulls may float to the surface'.
Then cook the grits with milk, nice and slow:
Meanwhile (there are a lot of 'meanwhile's in this recipe), take some tomatillos:
Blacken them under the broiler, and blend, adding jalapeno:
OK, they're not that black.
That's better.
Press through a food mill, and you have an amazing flavour enhancing pulp:

Meanwhile, fry some bacon!
Now you're talking!
Chop up onion and green pepper:
On the right: the shrimp broth.
Fry the aromatics in the bacon fat:
But what about the bacon? Hmmm. What can one do with bacon bits? It's like when a recipe calls for part of a bottle of wine; the only thing you can do is throw the rest away - it's such a waste! But then Katherine had a brilliant idea: WE COULD PUT THE BACON BITS IN A SALAD!
Meanwhile, whisk together some flour with the shrimp broth to make a thickener:
Now for the final act. Mix the paste in with the vegetables, and add the broth:
Reduce down to a gloopy consistency:
Then add the shrimp:
Now that's looking good. But how do you make shrimp like this look even better? Answer, put them over grits:
Look at them glisten!
OK, so that was a complicated dish to make, but it was worth it. The tomatillo and jalapeño gravy was tangy and delightful, and went very well with the grits. It was 'classy' shrimp and grits. Dinner party material (but maybe not for really fancy dinner parties; it's hard to serve prettily).